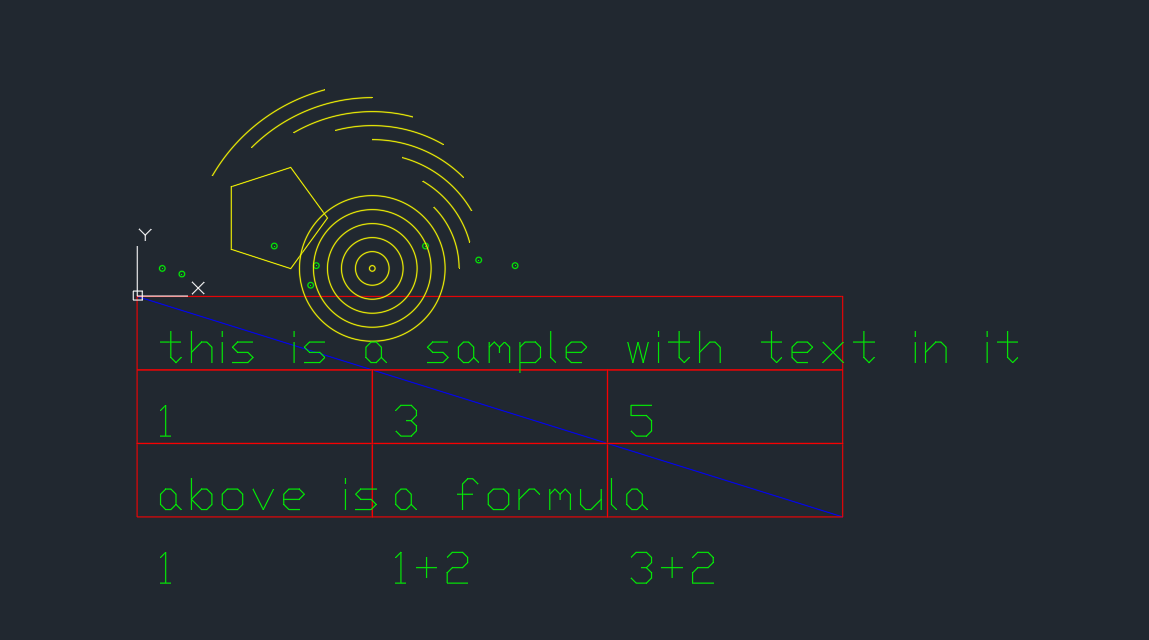
Create, Manage and Draw DXF Drawings Inside Excel With Previews
 Summary: Learn how to create, manage and display drawings inside of Microsoft Excel with Excel Draw
Article by: Kyle Gray
Gray Technical, LLC – CEO
DXF files inside Microsoft Excel
 Many people use DXF files every day. At work, school or even as a hobby. They are drawings used in CAD software. The technical definition of a DXF file as defined by Wikipedia is:
AutoCAD DXF (Drawing Interchange Format, or Drawing Exchange Format) is a CAD data file format developed by Autodesk for enabling data interoperability between AutoCAD and other programs. – https://en.wikipedia.org/wiki/AutoCAD_DXF
These files are common in architecture or product/blueprint designing. Something that is not so common is the ability to create or even manage these types of files inside of a program that almost everyone has access to; Microsoft Office Excel.
Excel Draw
 There are many software products available to open, read and even create DXF drawing files. However, only one can create DXF files in Microsoft Excel with a live preview: Excel Draw. Excel Draw will allow the user to create and manage a DXF file with a live preview inside of Microsoft Excel, essentially turning Excel into a drawing program.
This add-in can produce points, lines, rectangles, circles and even text inside of Microsoft Excel using its own built in graphing capabilities. With the standard X1 Y1 Z1 X2 Y2 Z2 point values you can literally draw objects inside of Excel the exact same way you can in AutoCAD or any other drawing software. Best of all, if you have Microsoft Office Excel (2007 or higher) installed on your computer then you can use Excel Draw regardless of operating system. That’s right, Excel Draw is Windows or Mac compatible.
Creating objects:
 Creating objects using Excel Draw is very simple. All you need to do is specify your X Y and Z object, select said object and click the button associated with that object (point, line, rectangle, circle or text). These objects can be either in relative points or absolute positions (default) or even changed between objects if needed. Z values are also completely optional and can be changed as well. You will not see the drawing right away, but you can generate the drawing with the ‘Generate Drawing’ button inside of the EXCEL DRAW tool ribbon.
 Simple enough, right? But what happens if your X Y Z data is not specifically in ‘X Y Z’ orientation? What if the data is in a ‘Y X Z’ or even a ‘Z Y X’, what then? Excel Draw has that figured out as well. Inside of the ‘Drawing Options’ menu button you can see all of the settings for these orientations, as well as text size. Pretty much everything is customizable, with the exception of color. As of now Excel Draw does not allow for color manipulation, but is being considered for future versions.
Managing objects:
 Excel Draw comes with something else that is very handy when creating a drawing with multiple objects, an Object Manger. The Object Manager (located in the ribbon under the button of ‘Object Manager’) will allow the user to view and select all the graphed objects. When selecting an object the live graph will be updated in real time, highlighting the selected object for a visual reference. Once selected the object can be highlighted, manipulated, deleted or the entire drawing can be wiped completely clean allowing the user to start over from scratch.
Another feature Excel Draw offers is the ability to rotate, pan and zoom inside of your Excel drawing. All of these features can be found in the ‘Graph Orientation’ window located in the graphing tab.
 Updating objects:
Updating objects is yet another feature that Excel Draw has went beyond for. By changing the values already linked the corresponding objects will automatically update on the shown graph. This allows the user to see in real time how their changes effect the drawing and saves valuable time when manipulating data.
 The drawing is complete and looks great inside of Excel, so what now? Exporting the drawing is just as simple as creating it. Click on the format you would like from the ribbon selection menu: DXF, PNG, PDF, TXT, HTML, JPG, XLS or CSV. Next select the export folder, specify a file name and click the export button. After exporting, Excel Draw will ask to open the exported document. This will open the exported document in the default program for that file type.
Excel Draw is a revolutionary new way of creating drawing files. For years Microsoft Excel has been the leading program in creating spreadsheets and data formula calculations, but graphing is simply not one of its strong suits. Excel, because of its reputation, is pretty much a necessity on every business machine, and being a necessity means most people are familiar with it. Excel Draw brings the complicated world of CAD drawings into a user-friendly and familiar setting.
Excel Draw, while currently the only way to create, view, manage and display live drawings inside Excel, is not a new idea. For many years users have requested a feature like this, but with Excel not offering many graphing capabilities such a task was thought to be out of the realm of possibility. Gray Technical stepped up to the challenge however and accomplished what others deemed impossible. While it is true that there are other alternatives to creating DXF files inside of Excel, there is only one that will display the drawing objects in real time inside of the extremely popular Microsoft Excel.
If you like this post and would like to subscribe to our newsletter to learn more about Gray Technical please follow this link.
As always if you would like to contact us for help or information please email us at support@graytechnical.com


 Previous Post
 Next Post


