Streamlining CAD Workflows: How Excel Draw Transforms Spreadsheet Data into Professional Drawings
Written By: Ada Codewell – AI Specialist & Software Engineer at Gray Technical
Streamlining CAD Workflows: How Excel Draw Transforms Spreadsheet Data into Professional Drawings
Are you tired of switching between multiple programs to create and manage CAD drawings? Do you struggle with sharing complex drawings with colleagues who don’t have access to expensive CAD software? Excel Draw offers a unique solution, allowing you to create professional-quality CAD drawings directly within Microsoft Excel. This article explores how Excel Draw can solve your drawing challenges and streamline your workflow.
Why You Struggle with Creating CAD Drawings in Excel
Creating CAD drawings is often a complex process that requires specialized software. Many professionals struggle with:
- Switching between different programs to create, edit, and share drawings
- Ensuring compatibility when sharing files with colleagues who don’t have access to the same CAD software
- Managing and organizing large amounts of drawing data within spreadsheets
Excel Draw addresses these challenges by integrating CAD capabilities directly into Excel. With Excel Draw, you can:
- Create professional CAD drawings without leaving Excel
- Share your drawings with anyone who has access to Excel, regardless of whether they have CAD software
- Easily manage and organize drawing data within the familiar Excel environment
Three Real-World Examples of Excel Draw in Action
Example 1: Architectural Floor Plans

Architects often need to create detailed floor plans that can be easily shared with clients and contractors. With Excel Draw, architects can:
- Import existing DXF files or create new drawings directly in Excel
- Customize layers, colors, and line widths to make their drawings clear and professional
- Export their drawings in various formats, including DXF, PDF, and image files, for easy sharing
Example 2: Engineering Schematics
Engineers often need to create detailed schematics that include precise measurements and annotations. With Excel Draw, engineers can:
- Enter XYZ coordinates directly into Excel cells to create accurate drawings
- Use the built-in distance calculator to ensure precise measurements
- Automate repetitive tasks using VBA macros to save time and reduce errors
Example 3: CNC Machine Programming

Manufacturers who use CNC machines often need to create and manage complex drawing files. With Excel Draw, they can:
- Create and edit DXF files directly in Excel
- Automatically export drawings to CNC machines using VBA macros
- Ensure compatibility with a wide range of software and hardware by using the industry-standard DXF format
Step-by-Step Solution: How to Create CAD Drawings in Excel Draw

Step 1: Install and Activate Excel Draw
To get started with Excel Draw, first download and install the add-in from the Excel Draw website. Once installed, you’ll need to activate your license by following the on-screen instructions.
Step 2: Create a New Drawing
To create a new drawing in Excel Draw:
- Open Excel and click on the “Excel Draw” tab in the Ribbon.
- Click on “New Drawing” to create a blank drawing or “Import DXF” to open an existing file.
- Use the toolbar to add shapes, lines, text, and other objects to your drawing.
Step 3: Customize Your Drawing
With Excel Draw, you can customize every aspect of your drawing:
- Change colors and line widths for individual objects or entire layers
- Use the “Properties” pane to adjust settings like line style, fill color, and text formatting
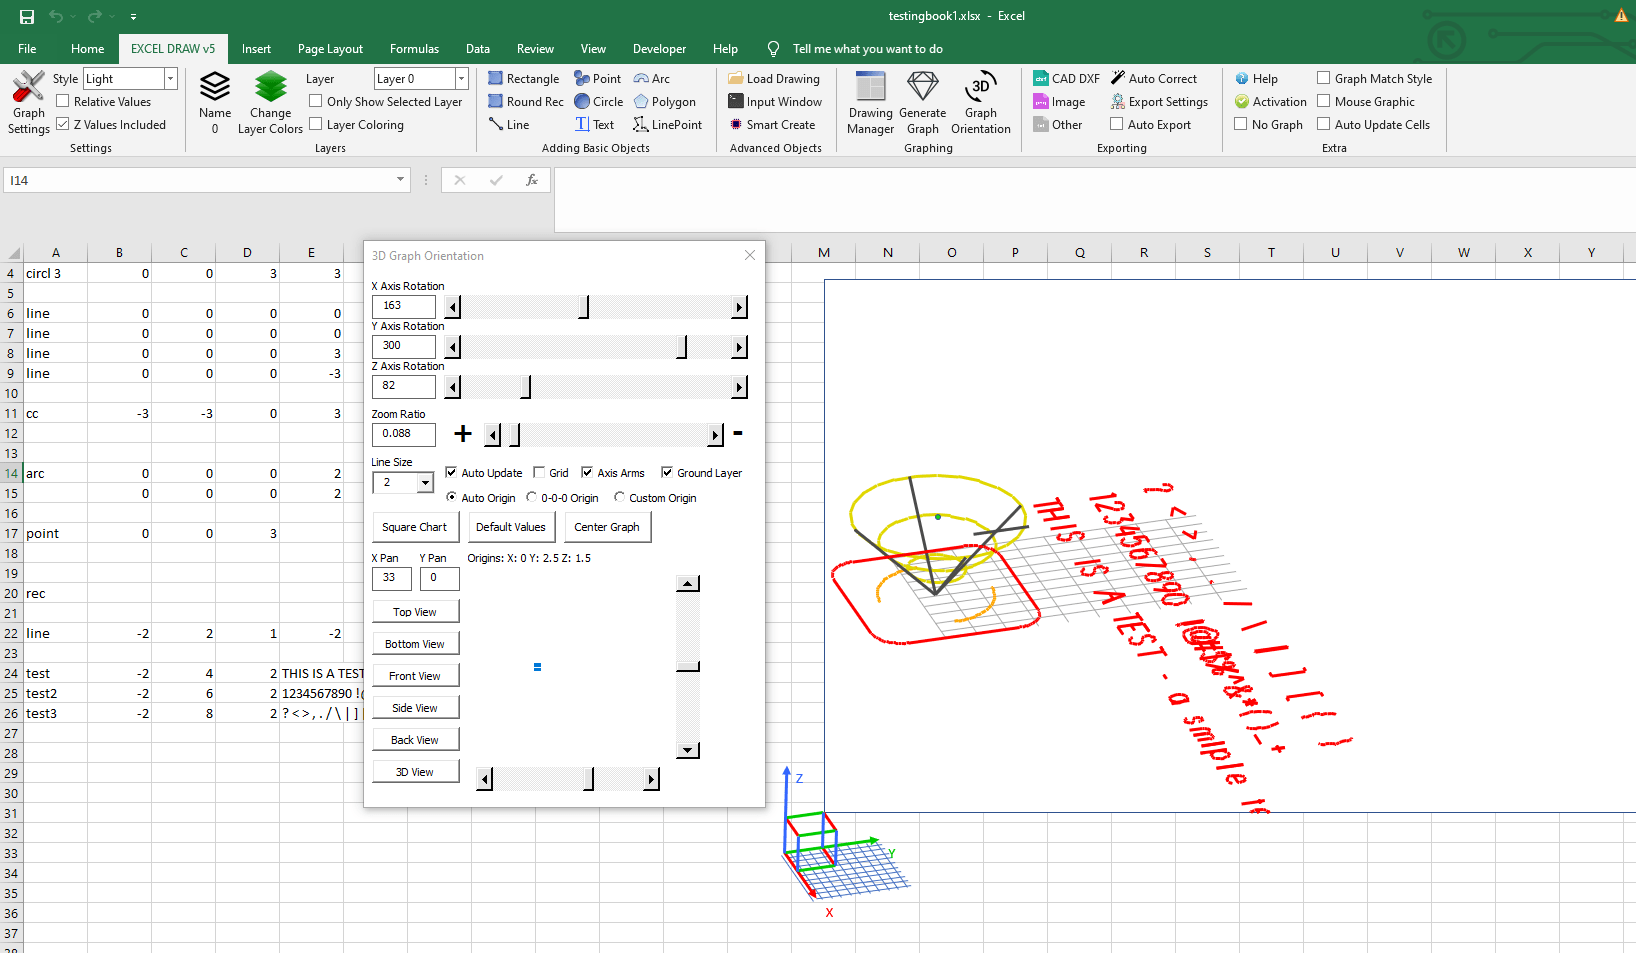
- Rotate, zoom, and pan your drawing using the interactive graphing engine
Step 4: Organize Your Data
The Drawing Manager in Excel Draw makes it easy to organize and manage your data:
- Use the manager to select, move, or delete objects
- Change layer assignments for individual objects or groups of objects
- Calculate distances between objects and add labels to your drawing
Step 5: Export Your Drawing
Once you’ve created and customized your drawing, you can export it in a variety of formats:
- Click on the “Export” button in the Ribbon
- Choose your desired format (DXF, PDF, image file, etc.)
- Select any additional settings, such as resolution or page orientation
- Click “Export” to save your file
Extra Tip: Automating Your Workflow with VBA
One of the most powerful features of Excel Draw is its support for VBA automation. With VBA, you can:
- Create custom macros to automate repetitive tasks
- Generate drawings from data in your spreadsheets
- Export drawings directly to CNC machines or other software
To get started with VBA in Excel Draw, check out the tutorial video on YouTube for examples and best practices.
Conclusion: Streamline Your CAD Workflow with Excel Draw
Excel Draw offers a powerful solution for professionals who need to create and manage CAD drawings within the familiar environment of Microsoft Excel. By integrating CAD capabilities directly into Excel, Excel Draw eliminates the need to switch between multiple programs and ensures compatibility when sharing files with colleagues.
With features like customizable layers, interactive graphing, and VBA automation, Excel Draw provides everything you need to create professional-quality drawings quickly and efficiently.
Ready to streamline your CAD workflow? Try Excel Draw today by visiting the Excel Draw website. With a free trial available, you can experience the power of Excel Draw for yourself without any commitment.

Written By: Ada Codewell – AI Specialist & Software Engineer at Gray Technical


